Ultra-Seal

Heavily Soiled Anti-Slip Porcelain Tiles Cleaning Kingston upon Thames

Restoring Heavily Soiled Anti-Slip Porcelain Flooring in Kingston upon Thames

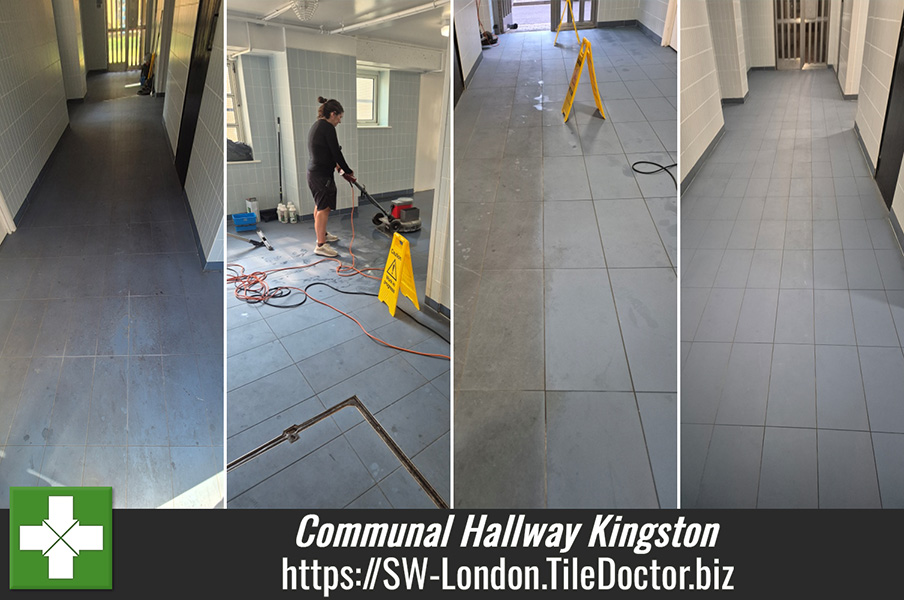
We were recently called to restore an anti-slip porcelain floor tiling in a communal area in Kingston upon Thames that had become heavily soiled over time. Despite regular cleaning, dirt had become deeply embedded within the textured surface and normal cleaning methods were no longer achieving the results needed.

Anti-slip porcelain is commonly used in areas where additional slip resistance is required, particularly in wet or potentially wet environments. However, the textured surface that provides this extra grip can also make the floor much more difficult to keep clean.
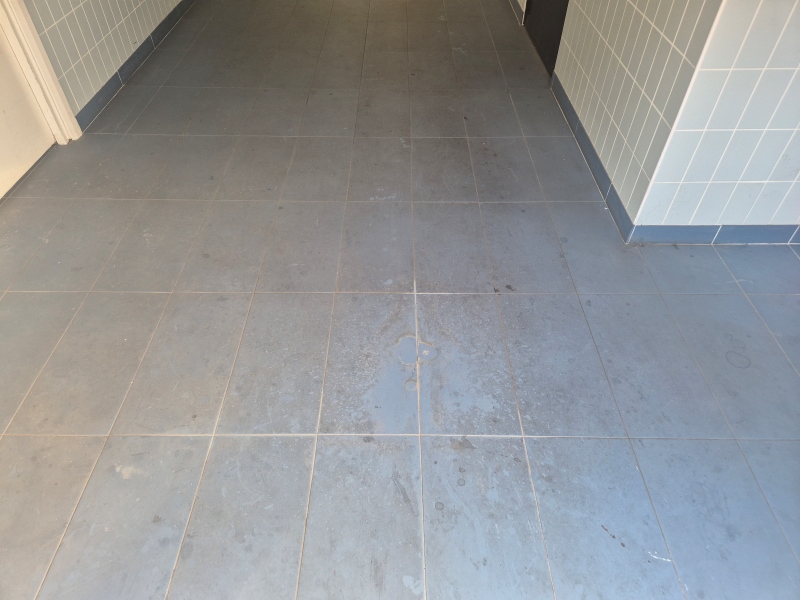
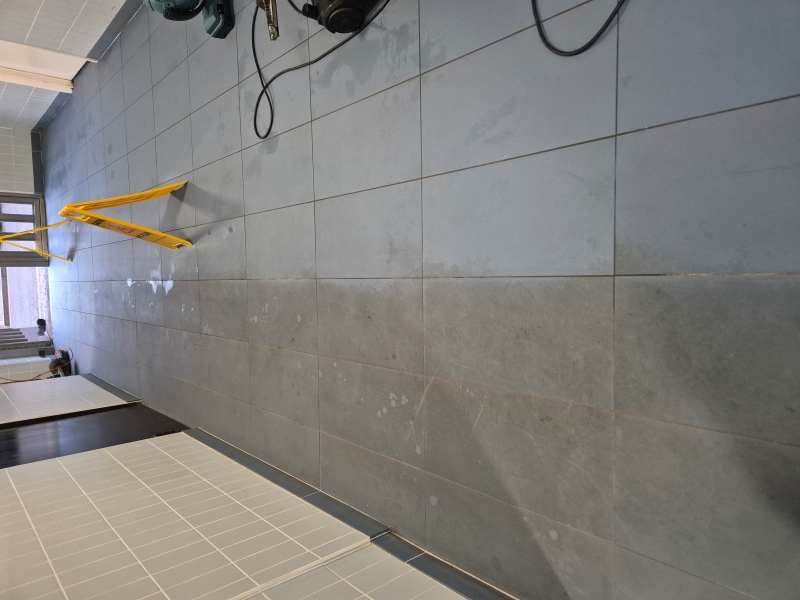
Heavily Soiled Anti-Slip Porcelain Tiles Before Cleaning Kingston upon Thames

The main challenge with heavily textured anti-slip porcelain is that dirt can become trapped within the profile of the tile. In this case, the floor had been cleaned regularly, but the available cleaning methods were not effective enough to reach into the texture and remove the ingrained dirt. Over time, this had left the floor looking increasingly dark, dirty and neglected.
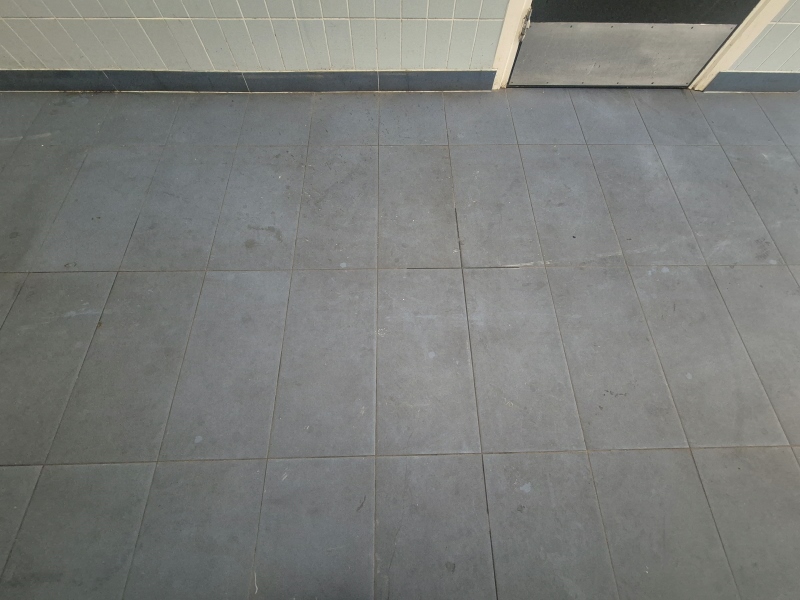
Heavily Soiled Anti-Slip Porcelain Tiles Before Cleaning Kingston upon Thames

Rather than simply carrying out another routine clean, the floor required a more intensive restoration process. I worked out a quote for this which was accepted and a date scheduled.

Deep Cleaning Anti-Slip Porcelain Floor Tiles

With it being a communal area that residents still needed to access throughout the day, we had to work carefully in sections, allowing residents to continue walking in and out of the building safely while the cleaning was carried out.

Work began by applying Tile Doctor Pro-Clean to break down the accumulated dirt and general soiling. The solution was then worked into the textured surface and grout using a Carbide Brush fitted to a rotary machine; this loosens deeply ingrained dirt trapped within the anti-slip profile.

For the more stubborn areas, Tile Doctor Acid Gel was also used to help tackle the deposits that had become particularly difficult to remove. Being a gel it’s much easier to control and ideal for spot cleaning.

The floor was then mechanically scrubbed using a black pad, helping to further loosen and lift the dirt from the surface. A wet vacuum was used to remove the dirty water and loosened contamination from the floor, helping to prevent the dirt from settling back into the textured surface.
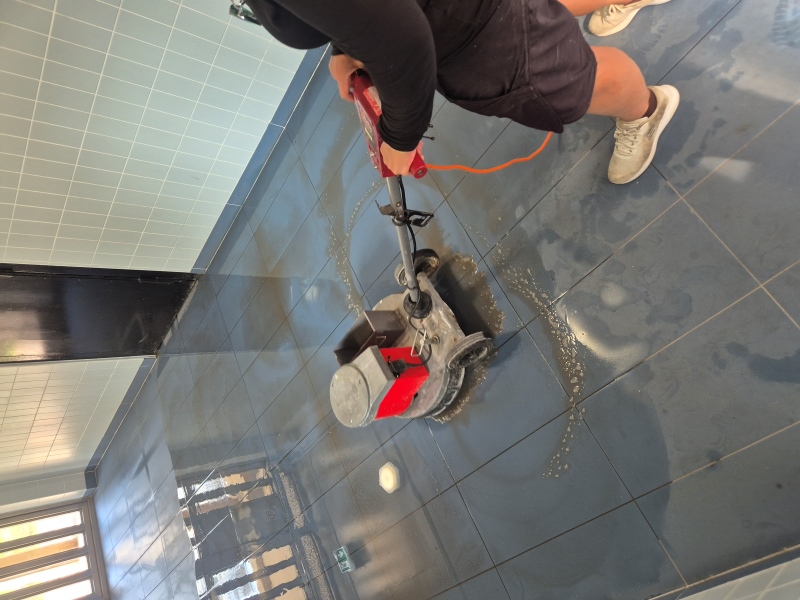
Heavily Soiled Anti-Slip Porcelain Tiles During Cleaning Kingston upon Thames Heavily Soiled Anti-Slip Porcelain Tiles During Cleaning Kingston upon Thames

The combination of the cleaning products, carbon brush, black pad and wet vacuum gradually removed the trapped contamination and produced a significant improvement in the appearance of the floor.

Once the deep cleaning process was complete, the floor was thoroughly rinsed and extracted again before leaving to dry and moving onto the next section.

Sealing Anti-Slip Porcelain Floor Tiles

Last step in the restoration was to apply a protective sealer to provide protection and help make future maintenance easier. For this a coat of Tile Doctor Ultra-Seal was applied which is an impregnating sealer that’s almost invisible and so doesn’t change the look of the tile.

It is important to remember that sealing is not a one-off maintenance solution. In a busy communal area like this, the sealer will naturally wear over time due to regular foot traffic and cleaning. We would recommend checking the condition of the sealer at least once a year and topping it up with the appropriate sealer when required. This helps maintain the protective properties of the treatment and can help prevent the floor from becoming difficult to clean again.

The transformation was clear, with the heavily soiled porcelain restored to a much cleaner and brighter condition. Regular professional maintenance will help keep the dirt under control and prevent another heavy build-up.
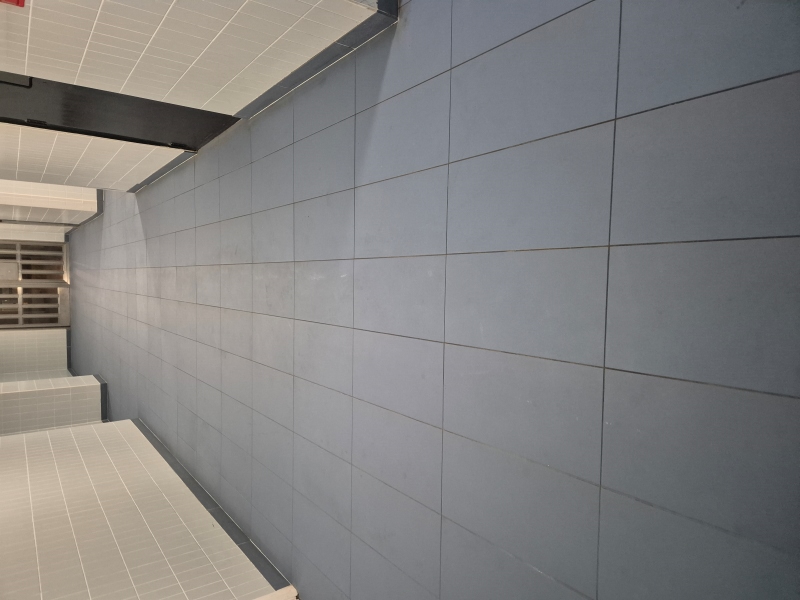
Heavily Soiled Anti-Slip Porcelain Tiles After Cleaning Kingston upon Thames

Maintaining a busy Anti-Slip Porcelain Tiled Floor

A busy floor like this needs the right equipment and maintenance regime to prevent dirt becoming trapped in the textured surface. Ideally, a professional scrubber-dryer would be used, but the site does not have this equipment, which contributed to the build-up of ingrained dirt.

With this in mind, we recommended taking advantage of our maintenance program which involves our return a professional deep clean approximately every six months, depending on traffic and soiling. During these maintenance visits, we can also check the sealer and top it up when required. We also recommended using Tile Doctor Neutral Tile Cleaner for regular cleaning which being ph neutral won’t impact the sealer.


Anti-Slip Porcelain Tile Cleaning and Maintenance in South London

Restoring Heavily Soiled Anti-Slip Porcelain Flooring in Kingston upon Thames Read More »

Limestone Tiled Shower Cubicle Renovation Isleworth

Stained Limestone Tiled Shower Cubicle Renovated at Isleworth Rental

Here we have a Limestone tiled shower cubicle with fifteen years of chemical damage and general grime at a rental property in the Hounslow borough of Isleworth. It had never been professionally cleaned since installation and previous tenants had used Viakal limescale remover.

Limestone Tiled Shower Cubicle Before Renovation Isleworth

Limescale removers like Viakal are acidic with a low pH and will etch natural stone such as Limestone so definitely not recommended. The product states to avoid use on natural stone on the label, which in this case was ignored.

Fortunately, there is a solution however it involves using various grades of diamond burnishing pads to cut back the stone to remove the damage and restore its appearance. I worked out a quote for renovating the stone and cleaning the grout which was equally stained. Happy to have found a solution and keen to have the shower cubicle ready for the next tenant I was asked to go ahead,

Shower Tile and Grout Cleaning

I started off by cleaning the grout with a wire brush and Tile Doctor Pro-Clean. Unfortunately, the grout was so bad it couldn’t get it consistently clean so decided to apply a grout colourant on it later.

Next attention turned to resurfacing the Limestone starting with the application of a 400-grit 6-inch pad fitted to a DeWalt machine. The pads are applied with water for lubrication and are designed to resurface the stone to remove the etching. I very quickly realised however the 400-grit wasn’t having the desired effect so I dropped down to a 200-grit pad, this also didn’t work so I went down to a 100-grit. This did the job and the Limestone started to show improvement.

The 100-grit pad was then run across the all the effected Limestone again using water for lubrication. Once done the tiles were rinsed with water to remove and the pad switched for a 200-grit. This process was then repeated working through increasingly finer pads of 400, 800 and then finally 1500-grit.

Once the whole shower was burnished in this was the remaining water was vacuumed away with a Hyundai wet vac and the shower left to dry with a fan in place. When I came back, I checked the results of the burnishing and realised there were still visible marks on some of the Limestone tiles and so repeated the process starting with the 400-grit pad and up; eventually after around 6-7 hours I had the desired finish.

Sealing Limestone Shower Tiles

A lot of water was used during the burnishing so I left the shower to dry overnight and added the finishing touches the following day. This included cutting out the silicone sealant and sealing the stone with Tile Doctor Ultra-Seal. I wanted to keep the stone light so decided against using a colour enhancer.

After allowing two hours for drying the last steps were to colour the grout using one of Tile Doctor’s Grout Colourants in a Limestone colour and then apply fresh silicone mastic around the edges.

Limestone Tiled Shower Cubicle After Renovation Isleworth

This was the hardest job I’ve done so far but the result was worth it. The shower cubicle looked like a new installation and my customer was very happy with the result; they had very low expectations and this far surpassed them.


Professional Stone Tiled Wet Room Renovation in Berkshire

Stained Limestone Tiled Shower Cubicle Renovated at Isleworth Rental Read More »

Terrazzo Tiled Cinema Floor Polishing Twickenham

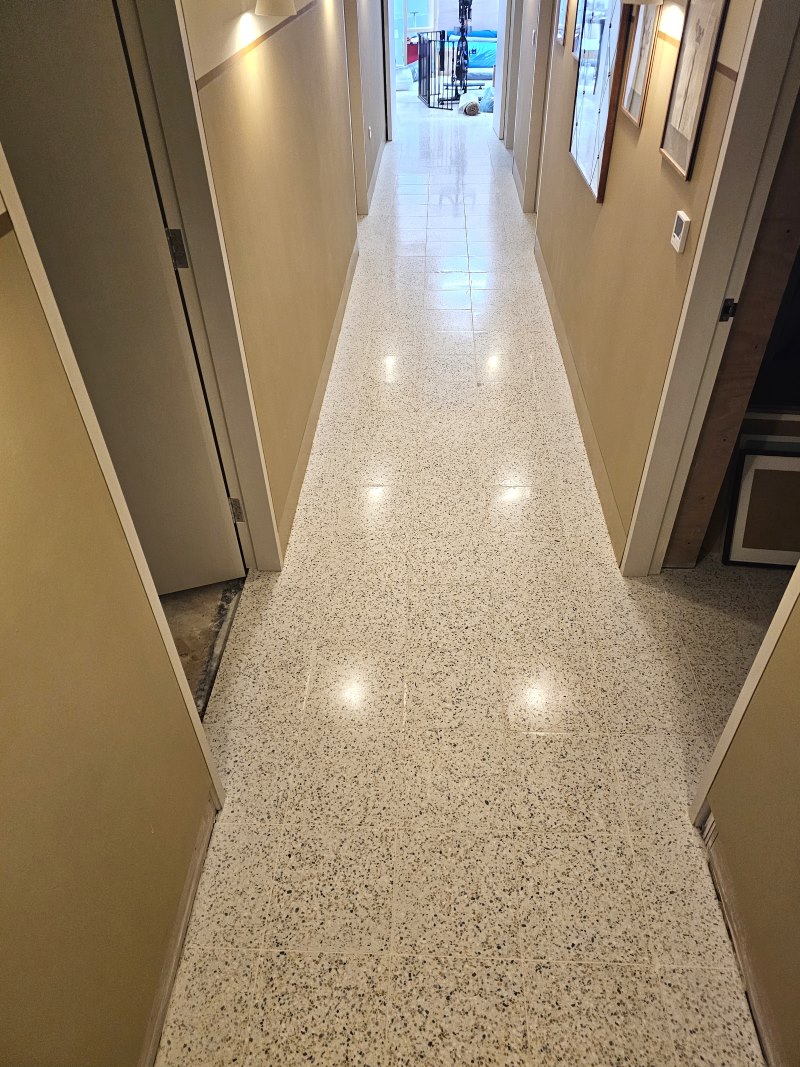
Terrazzo Tiled Cinema Hallway Floor Renovated in Twickenham

Cleaning a Terrazzo Tiled Cinema Hallway

Late last year I was asked to renovate 1000m2 of Terrazzo tiles in the public spaces of a Cinema in Twickenham . It sounded like a dream job however the complication was the work could only be done out of hours, and I would need to start at 5am and be gone before they opened for business at 11:00.

The Terrazzo tiles had been regularly cleaned however the sealer had worn down with all the foot traffic they had received, and this resulted in dirt becoming ingrained in the tile leaving them extremely dirty. Another issue was that the installer had not managed to polish off all the grout during installation and so the tiles had grout haze staining over the surface which detracted from their appearance and resulted in a rough texture that trapped dirt easily.

Terrazzo Tiled Cinema Hallway Floor Before Cleaning Twickenham Terrazzo Tiled Cinema Hallway Floor Before Polishing Twickenham

To resolve all the issues the Terrazzo needed to be burnished with diamond pads to remove the grout haze and bring up their appearance. Once that had been done, they would need to be sealed to prevent dirt from becoming ingrained in the pores of the tile, this would also make them easier to keep clean. Due to the sheer size of the project, I had calculated the work would take approximately six weeks in total however due to the restrictions and other complications it would need to be done over a six-month period. The manager of the cinema didn’t want the operation of the cinema impacted by the cleaning so was happy to agree to the plan.

To complete this floor, I worked in small sections using an industrial Victor Trojan buffing machine and Tile Doctors diamond pad diamond burnishing system. I found the first 400-grit pad which was applied using only water immediately took off the dirt and grout haze from the terrazzo leaving the tile with a nice smooth face. This process generates a lot of soiling which is contained in the water turning it into a fine slurry which was then removed using a wet vacuum.

After this the 400-grit pad was switched to a finer 800-grit pad which is the first step in repolishing the tiles as well as taking off any areas of dirt missed earlier. The pad is run over the floor as before with water for lubrication and once done the soiled liquid was extracted again. Next up was the 1500-grit pad being a lighter pad used to give the tile a last wet polish before you move on to sealing and dry polishing.

Once the 1500 pad was completed, the floor was given a rinse with water and the now clean section of flooring dried as much as possible with the wet vacuum. The tiles were then left to dry with a hot air floor blower in place to speed up drying the floor.

Terrazzo Tiled Cinema Hallway Floor During Polishing Twickenham Terrazzo Tiled Cinema Hallway Floor During Cleaning Twickenham

Sealing a Terrazzo Tiled Cinema Hallway Floor

It wasn’t long before the tiles were dry and ready for sealing with an application of Tile Doctor Ultra-Seal which is a natural look impregnator that soaks into the tile and protects without changing its appearance. The sealer was rubbed in by hand with a micro fibre cloth making sure to remove any excess. Two coats were applied with a thirty-minute dry time in-between coats.

Once the sealer had dried the floor was burnished again, this time a very fine 3500-grit burnishing pad. Only a little water is applied when using this pad, dry polishing the tiles with a left right then circular movement. This works the sealer into the tiles, closes the pores and gives the tile a smooth, non-slip wipeable surface that will be difficult for dirt to penetrate in the future.

Once complete the grout haze was gone and the Terrazzo looked great with a deep shine. My client was extremely happy with the transformation and said it looked like a new floor.

The section of hallway in the photographs took four mornings to complete but it was the tip of the iceberg really with a lot more floor to do before the job would be finished.

Terrazzo Tiled Cinema Hallway Floor After Polishing Twickenham

For the aftercare of Polished Terrazzo, I recommend the use of Tile Doctor Stone Soap which is a ph neutral floor cleaner that contains a patina enhancer that will help maintain the appearance of the tiles without impacting the sealer.

Professional Restoration of a Terrazzo Tiled Cinema Floor in Southwest London

Terrazzo Tiled Cinema Hallway Floor Renovated in Twickenham Read More »

Terrazzo Tile Grout Haze Removal Barnes

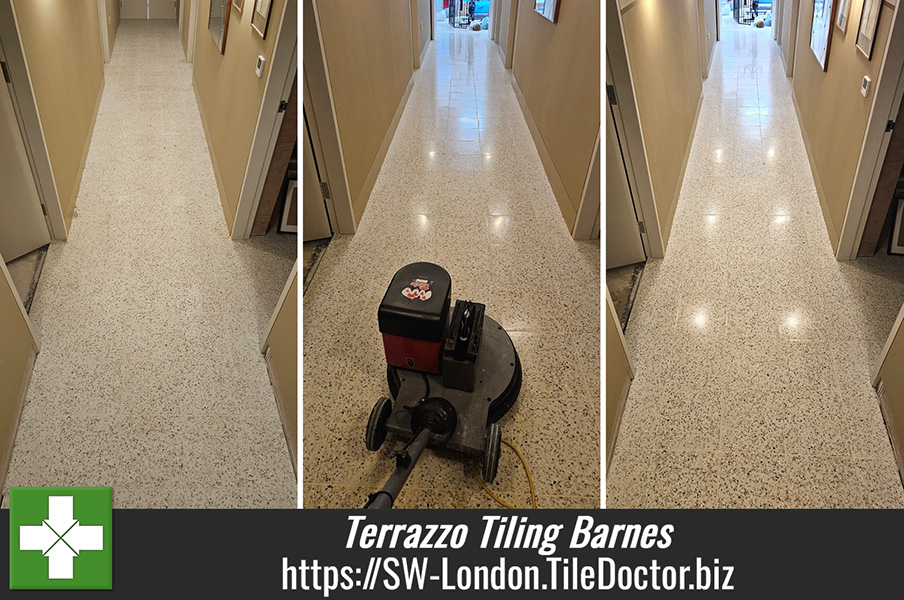
Grout-Stained Terrazzo Hallway Floor Renovated in Barnes

The pictures below come from a property in Barnes near Richmond upon Thames where a hallway floor had been laid with Terrazzo tiles. The tiles had been laid well but unfortunately the tiler had spread grout all over the tiles and not cleaned it off properly.

This is not uncommon when tiling a floor and is known in the trade as Grout Haze or Grout Smearing, the results in a haze over the tiles which detracts from their appearance. To make things even worse however, the tiler had then applied a sealer over the Terrazzo with the grout still on there. This locked in the hazy finish and left the tiles looking dull.

Terrazzo Floor Grout Haze Before Cleaning Barnes

Since that time the sealer had worn down and the floor had collected lots of ingrained dirt, leaving it darker and discoloured and subdued.

I was called in to renovate the floor and having surveyed the tiles I recommended burnishing the tiles with a set of Tile Doctor Burnishing Pads which are made from different grades of industrial diamonds. They clean the floor, removing staining such as the grout haze and build an attractive sheen on the Terrazzo. Once done I would re-seal the floor with a natural look sealer.

I worked out a quote which was accepted, and a date set for the work to start.

Cleaning a Terrazzo Tiled Hallway

Work started with the application of the first burnishing pad which is a coarse 400-grit and this is attached to a floor buffing machine that had an extra 55kg of weight added. The pad is run over each tile several times using only water for lubrication. The water turns black with the dirt released from the floor and after completing the whole floor it is rinsed away and extracted with a wet vacuum.

This process is then repeated with the finer pads of 800 and 1500 grit which start to build a polish onto the tile. After each pad is run over the floor the slurry is rinsed off and extracted as before. The last burnishing pad is a super fine 3500-grit, and this is applied dry with just a little water sprayed onto the tile to really bring up the shine.

Terrazzo Floor Grout Haze During Burnishing Barnes

Sealing a Terrazzo Tiled Hallway

The floor was left to dry off overnight and the next day I returned to seal it with Tile Doctor Ultra Seal which is a natural look almost invisible sealer that doesn’t alter the appearance of the tiles. It is an impregnating sealer that soaks into the tile, occupying the pores and thereby preventing dirt from residing there, thus keeping the dirt on the surface where it can be easily cleaned away.

Regarding cleaning, I recommended the use of Tile Doctor Stone Soap, it is a gentle but effective tile cleaner made to a special formula that helps maintain the patina on the tile. It’s important to use a product like this for cleaning a sealed floor as many of the products you find in supermarkets are simply too strong and will damage the sealer.

Terrazzo Floor Grout Haze After Renovation Barnes

The Terrazzo responded well to the burnishing and my client was very happy with the floor which had never looked like it should. As it turns out he is also the owner of three large independent cinemas in London with over 1000m2 Terrazzo spread across them and because of this job I’ve now been asked to go and do the same there too.


Professional Renovation of a Terrazzo Tiled Hallway in Southwest London

Grout-Stained Terrazzo Hallway Floor Renovated in Barnes Read More »

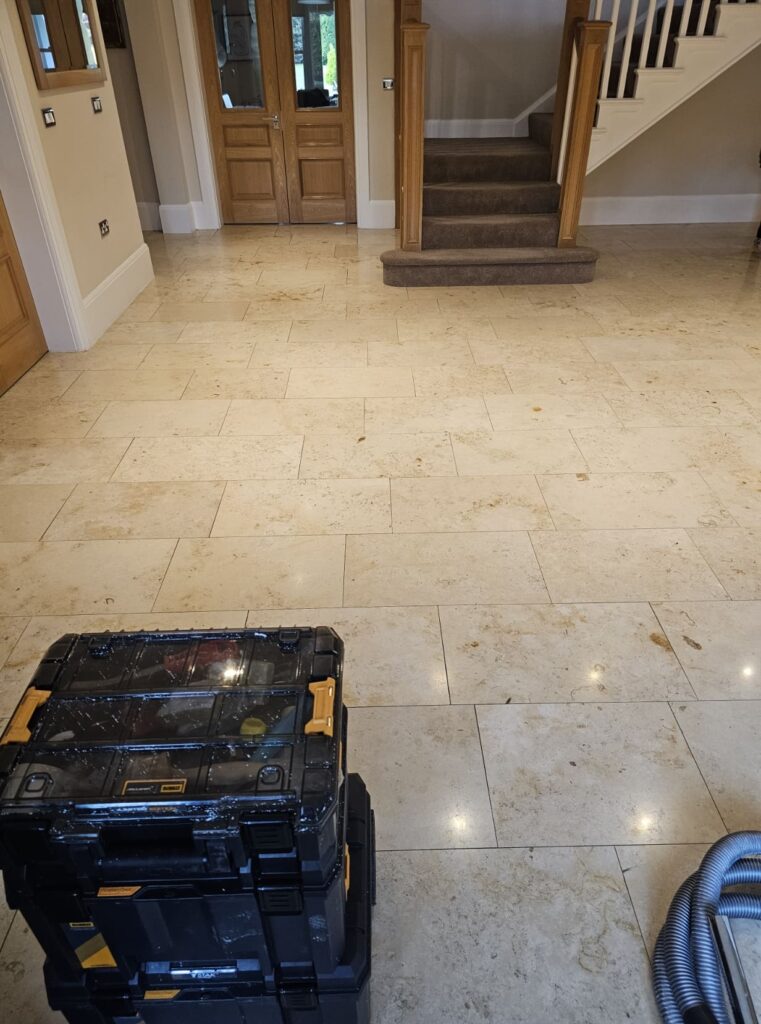
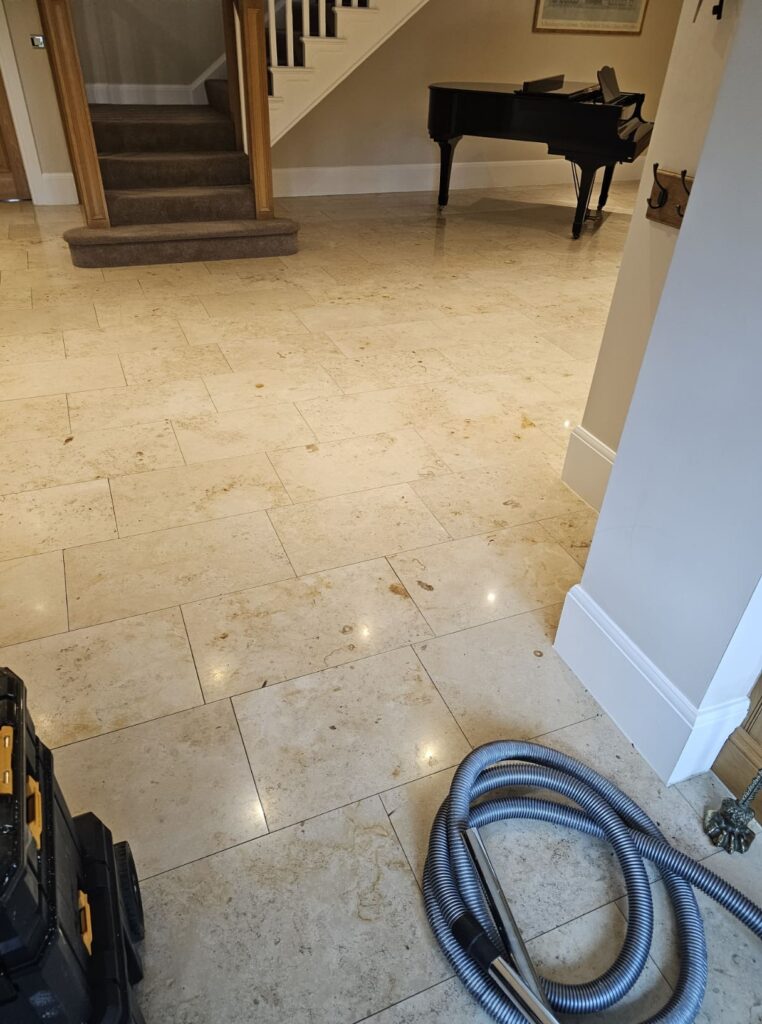
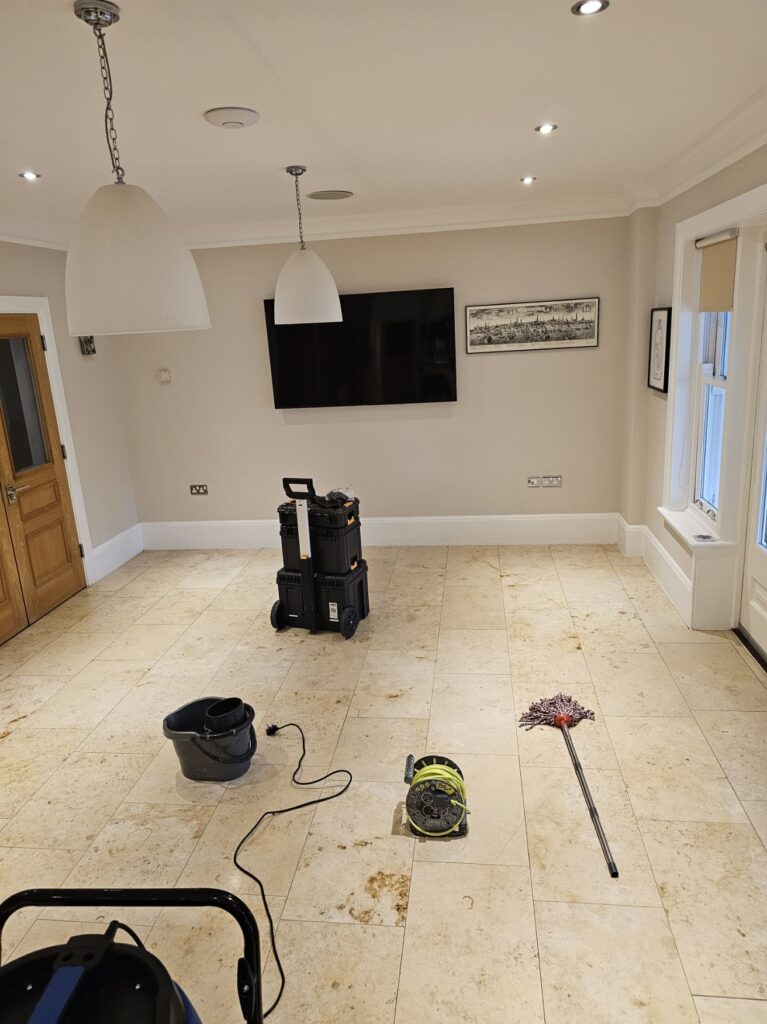
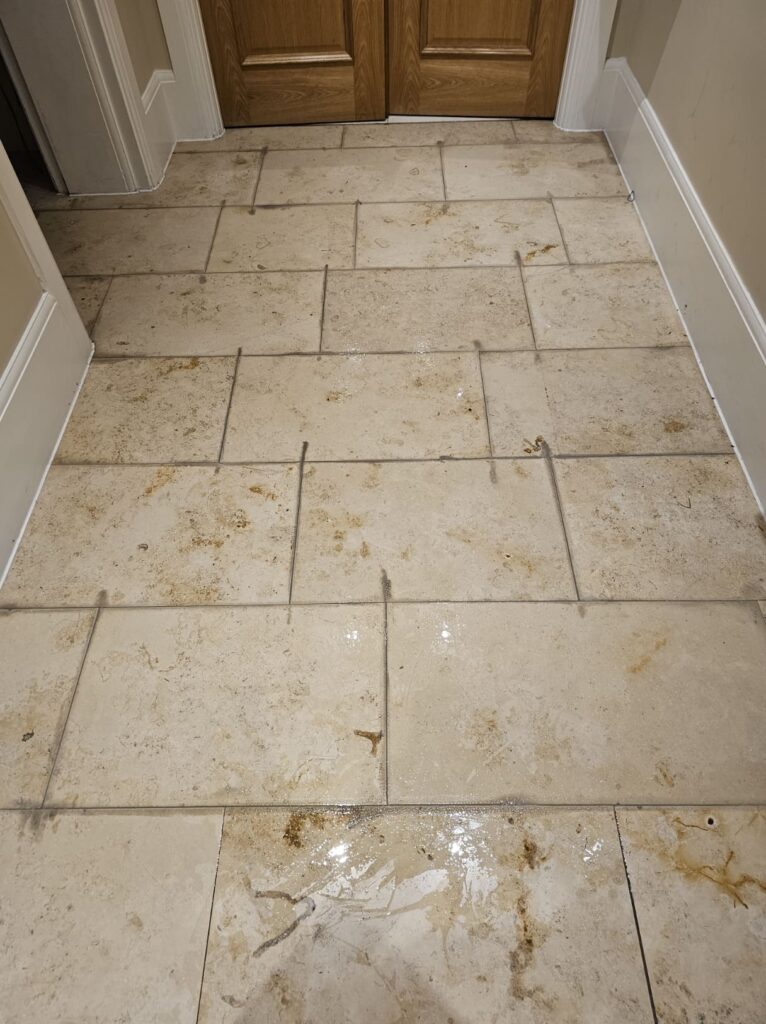
Limestone Floor Polishing Surbiton

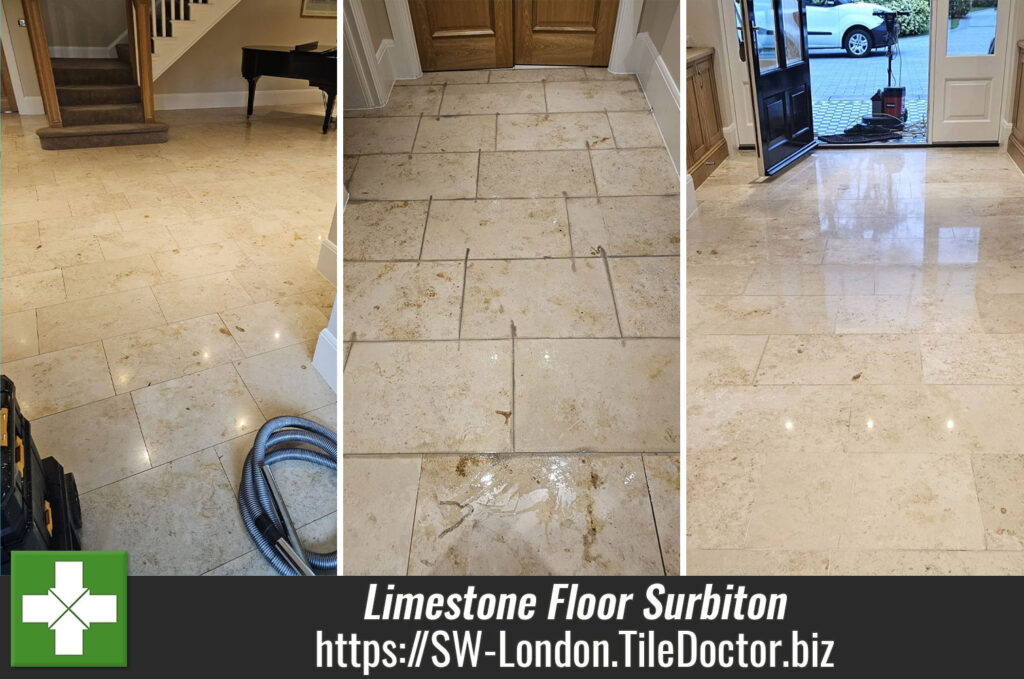
Large Limestone Floor Cleaned, Polished and Sealed in Surbiton

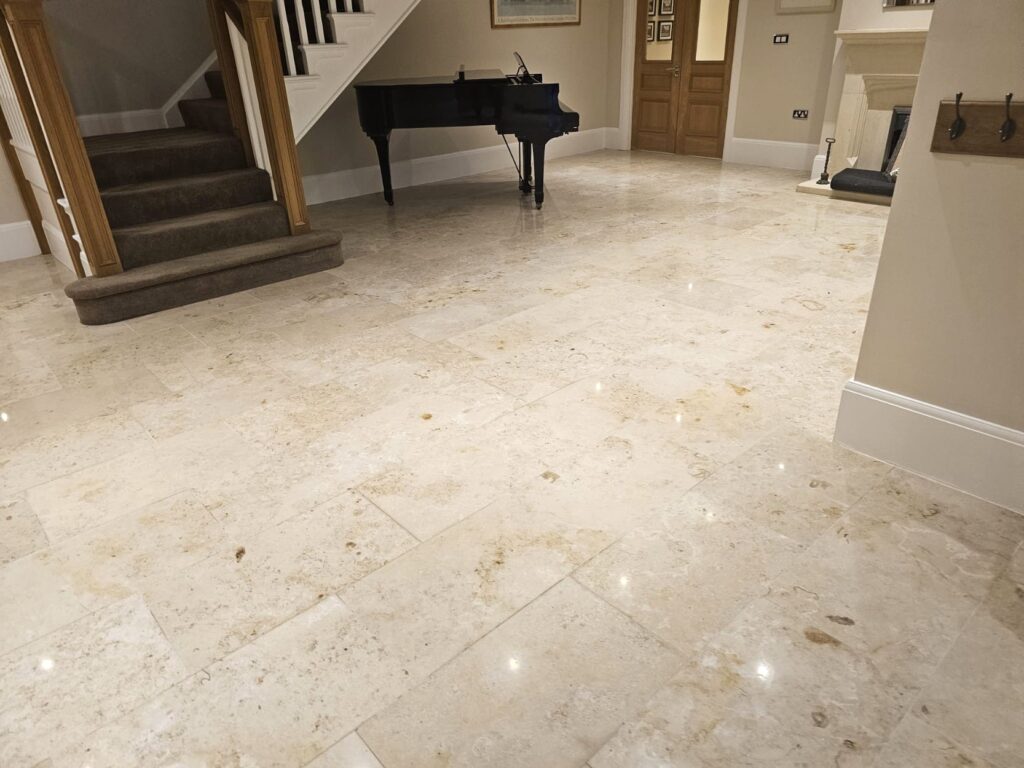
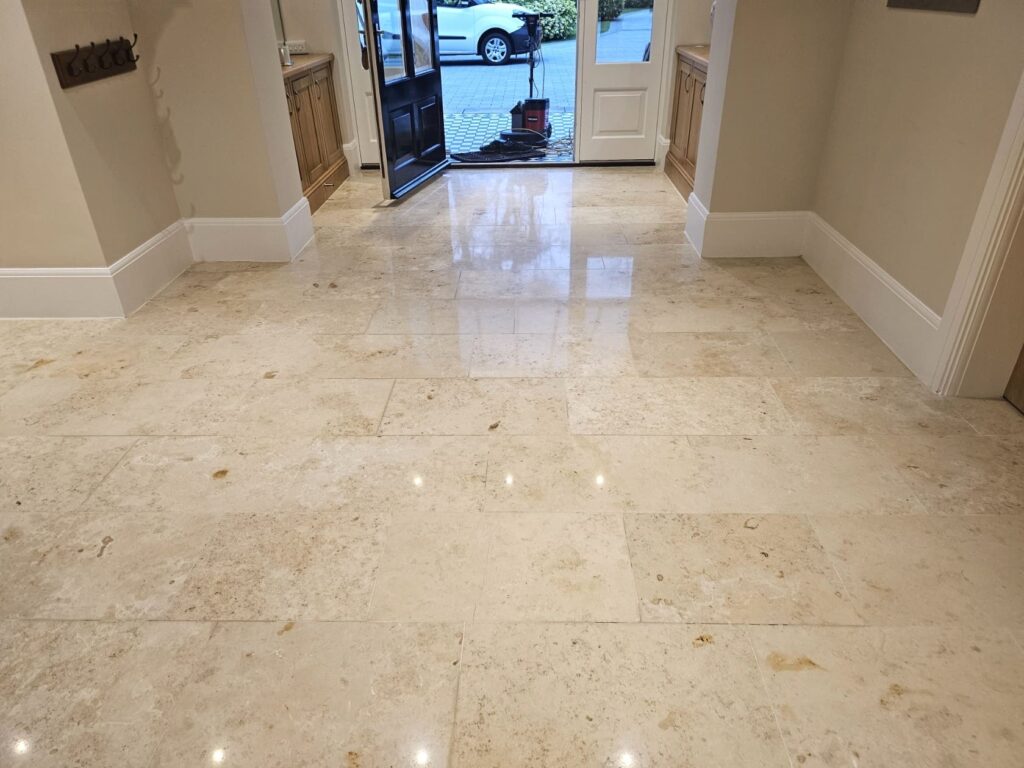
This large Limestone tiled floor at a property in Surbiton had been recently maintained by a cleaning company who didn’t do a thorough job. They hadn’t done anything to improve the polish on the Limestone and unfortunately stripped off the original sealer during cleaning leaving it vulnerable to ingrained dirt.

Limestone Floor Before Cleaning Surbiton Limestone Floor Before Cleaning Surbiton

The stone floor now looked very flat and lifeless and I was asked to do the job properly, including deep cleaning the grout, polishing the stone and finally replacing the sealer.

Stripping and Polishing Tumbled Limestone Tiles

I started work by focusing on the grout which had become darkened with dirt. For this I applied a strong dilution of Tile Doctor Pro-Clean along the grout lines, left it to soak in for a few minutes and then worked it in with a wire brush. This process turned the grout from Black back to White and the dirt was rinsed off with water and extracted with a wet vacuum.

Limestone Floor During Cleaning Surbiton Limestone Floor During Grout Cleaning Surbiton

The next step was to burnish the stone using a set of Diamond encrusted pads of increasing grits that range from a coarse 400-grit to a very fine 3000-grit. The pads are fitted to the rotary machine and are run across the whole floor lubricating with water which darkens as the dirt is lifted out of the stone. Each pad is moved slowly across the floor with the machine leaving small rings on each pass. The floor is then rinsed and all the slurry with a wet vacuum after each pad.

It was a large floor that extended from the hallway into the Kitchen so it took some time to cover every section thoroughly. I stopped one the 1500-grit pad had been applied and after another rinse and extraction left the floor to dry off overnight.

Sealing Limestone Tiles

I returned the next morning and set about sealing the floor with Tile Doctor Ultra-Seal which is an impregnating natural look sealer that soaks into the pores of the Limestone protecting it from within. The sealer will ensure any dirt remains on the surface where it can be easily cleaned away.

I left the sealer to dry for an hour before polishing the floor with the last in the set of burnishing pads which is a 3000-grit pad. I covered every angle of light to make sure I’d left no smudges anywhere. This pad is applied with only a little water sprayed on to the stone as its run over the surface, this technique is known as a spray burnish and leaves the floor dry.

Limestone Floor After Polishing Surbiton

Before leaving I took time to discuss aftercare cleaning which for polished stone floors, I recommend Tile Doctor Stone Soap which not only cleans but also help maintain the patina on polished stone.

Limestone Floor After Polishing Surbiton


Professional Renovation of a Large Polished Limestone Floor in South London

Large Limestone Floor Cleaned, Polished and Sealed in Surbiton Read More »

╳
Scroll to Top