Ceramic Tile Cleaning

Welcome to my Work History archive where you will find detailed examples of Ceramic Tile and Grout Cleaning/Renovation work carried out in South West London

Cleaning Ceramic Tiles

Ceramic tiles are usually fully glazed and so do not have any pores that dirt can become ingrained into, because of this they are easy to clean with Tile Doctor Neutral Cleaner and are generally low maintenance. Textured ceramic tiles however are one exception, they have a rough surface in order to make them less slippery and are often used around wet areas such as swimming pools. Dirt is easily trapped in the textured surface and to get these clean requires a more intensive clean ideally using a rotating scrubbing pad.

Due to their low maintenance we rarely get called to deep clean Ceramic tiles however grout is a different case. The top layer of grout is actually porous and due to it being recessed we find when they are mopped it leads to a build-up of dirt on the grout causing it to discolour. This can be resolved using Tile Doctor Pro-Clean and then once clean and fully dry, seal the grout with one coat of Tile Doctor Ultra-Seal using a pipette.

Ceramic tiles are used a lot in bathrooms and shower cubicles where again we find it’s usually the grout or silicone sealant that discolours before the tiles do. In these cases we often find the appearance can be greatly improved with the use of a Grout Colourant and replacement of the silicone.

Below you will find detailed examples of work we have carried out in the past, it should give you some idea of what’s involved and what can be achieved with the right techniques and products


Bathroom Floor Tile Grout Renovation Lampton

Grout Recolouring of a Ceramic Tiled Bathroom Floor in Lampton

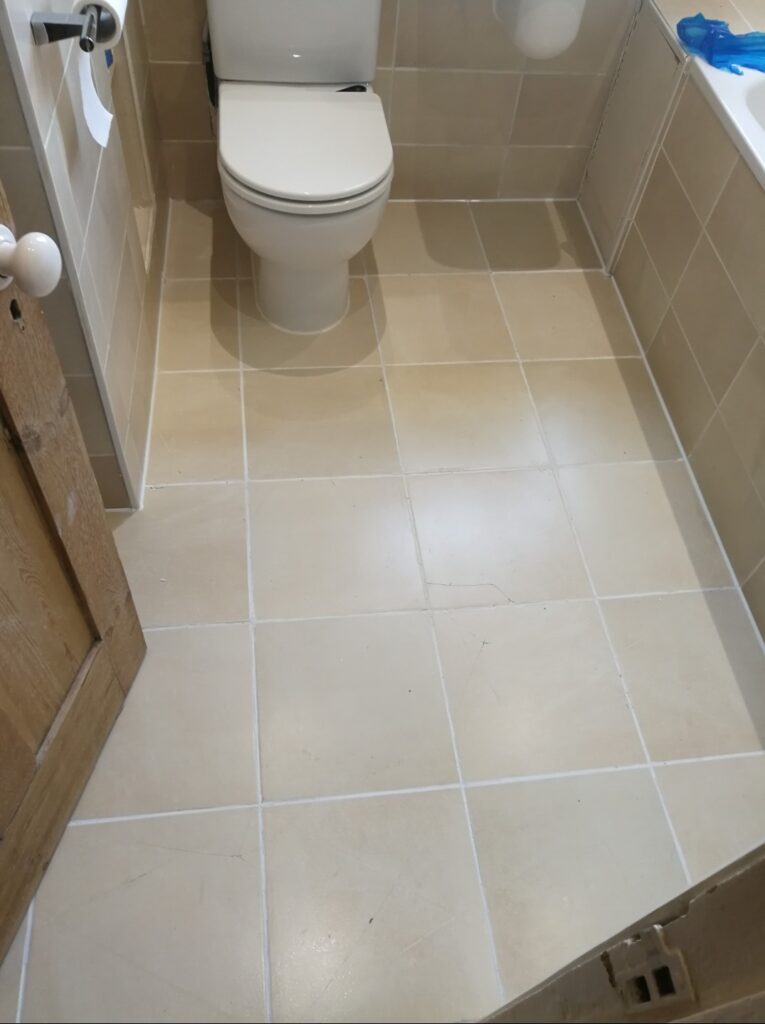
This client from Lampton near Hounslow was unhappy with the appearance of the grout in their Ceramic tiled bathroom floor and wondered if anything could be done to improve it. The grout was originally white to match the wall tiles and over the years it had darkened. This is quite a common problem with grout, especially in conjunction with glazed ceramic tiles; the glaze makes the tile impervious to water resulting in dirt being washed into the grout lines during cleaning. The rough cementitious surface of the grout traps the dirt eventually causing it to darken.
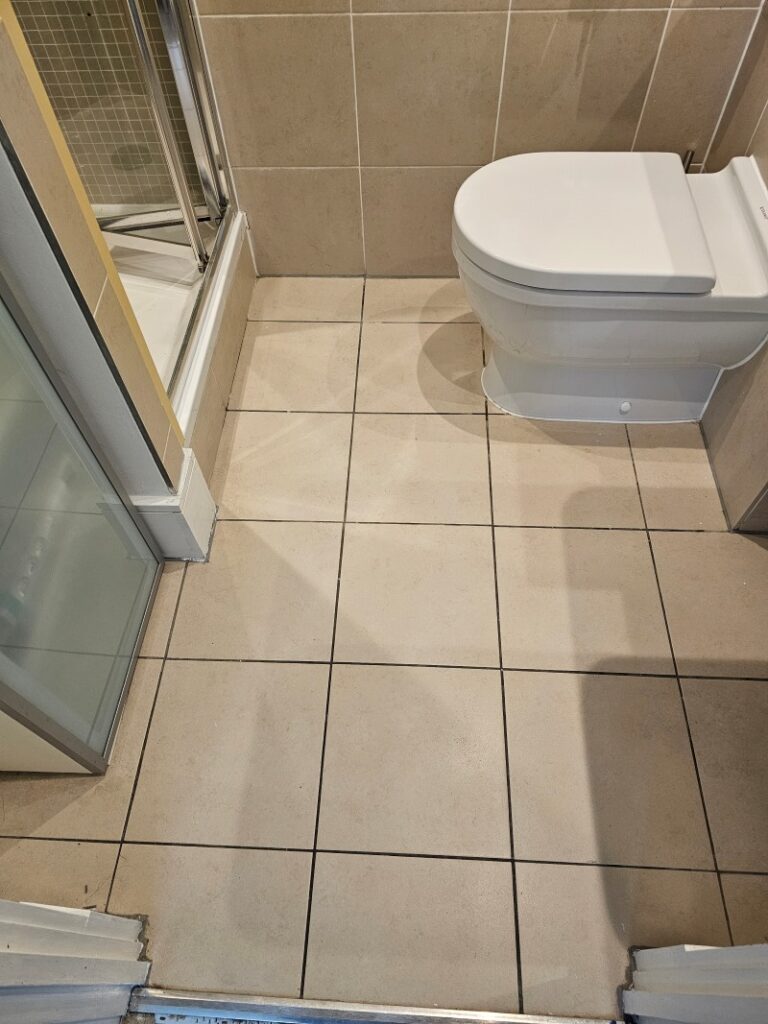
Bathroom Floor Before Grout Colouring Lampton

I asked for some photographs, and we discussed the various options over the phone. I’m not a fan of replacing grout as it takes a long time, generates a lot of dust and you risk chipping the tiles in the process, also there is every chance the problem will come back. I therefore recommended cleaning the grout and then applying a Tile Doctor Grout Colourant in White.

Grout Colouring is much quicker than re-grouting and you have the additional advantage of the colourant forming a waterproof barrier over the grout thereby making it much easier to keep clean and protecting the grout underneath. The Tile Doctor range of grout colourants come in eleven different colours with White being the most popular.

I asked for some dimensions and the size of the tile. From that I was able to work out an accurate quote for doing the work including the replacement of mastic sealant where needed. Happy with my quote we agreed a date for the work to start which should take less than a day to complete.

Cleaning the grout in a Ceramic Tiled Bathroom

Work started by stripping out the silicone between the floor and wall tile, then cleaning up the grout with Tile Doctor Grout Colourant Pre-Treat cleaner. This is an acidic cleaning solution that is sprayed onto the grout and then scrubbed in. This cleans the grout joints, and the acidic nature of the cleaner helps prepare the grout to achieve a better bond with the colourant. Once done the grout was wiped with a wet sponge to remove the dirt and then dried ready for the colourant.

Sealing the grout in a Ceramic Tiled Bathroom

Once the grout was dry a White grout colourant was painted onto the grout using a small colourant applicator that screws onto the top of the bottle, wiping off any excess from the tile as I went.

With the grout colouring complete I ran a bead of fresh White silicone sealant around the perimeter of the floor and the job was complete. A fairly simple process but very effective and in this case, it transformed the appearance of the bathroom making it far more inviting.
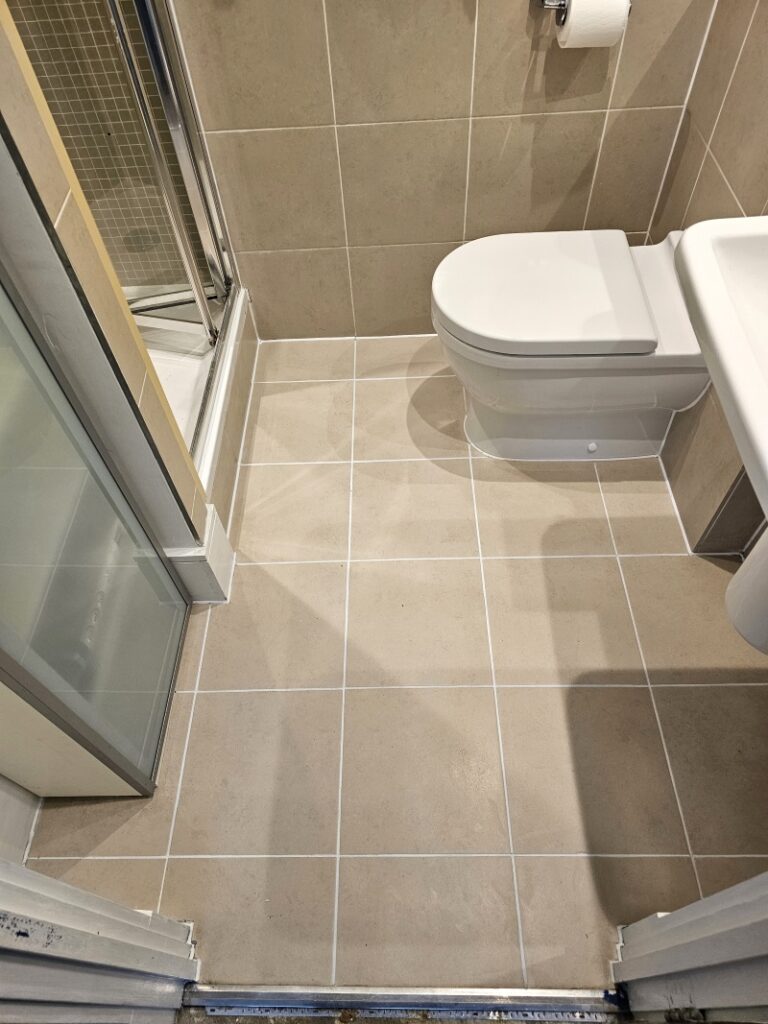
Bathroom Floor After Grout Colouring Lampton


Professional Restoration of Grout in a Ceramic Tiled Bathroom in Southwest London

Grout Recolouring of a Ceramic Tiled Bathroom Floor in Lampton Read More »

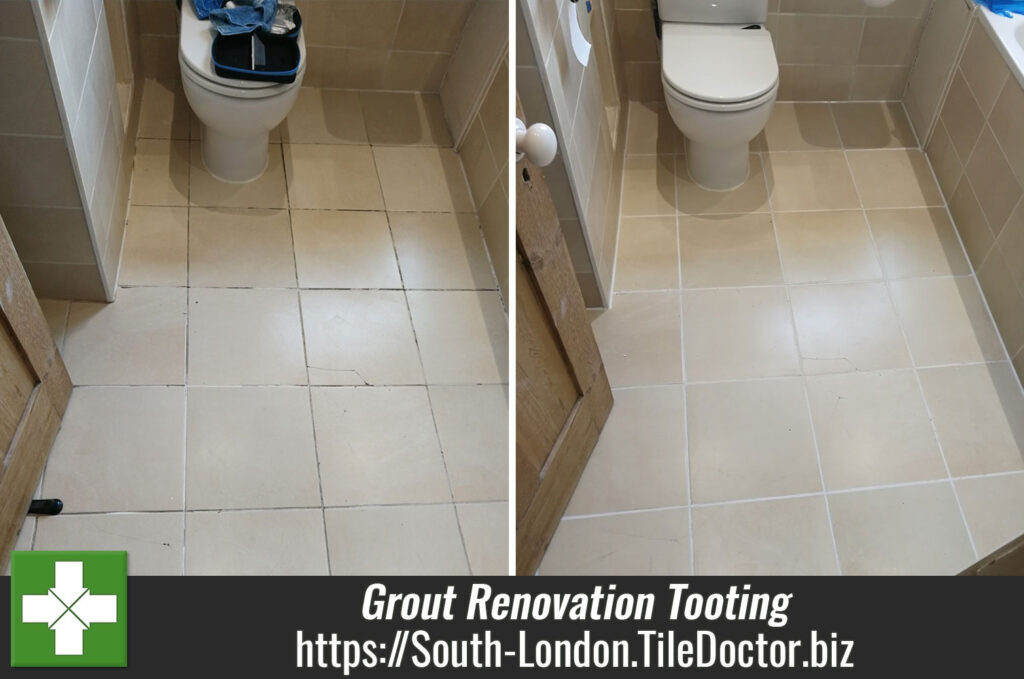
Bathroom Floor Grout Restoration in Tooting SW17

Bathroom Floor Tile Grout Restoration in Tooting SW17

A client was renovating a house in Tooting and wanted to see what could be done to improve the Ceramic floor tiles in the bathroom without the expense of a major overhaul. Having discussed the floor over the phone I was confident it could be improved and agreed a date to come over and survey the tiles and provided a quote for their renovation.

Bathroom Floor Grout Before Restoration in Tooting SW17

Except for one cracked tile, the tiles were in good condition and I could see it was really the grout that was bringing the bathroom down. The grout was generally discoloured and some had cracked and become loose. This cracking issue is indicative of using an inflexible grout when tiling on a wooden floor as these floors tend to have a bit of movement in them.

I discussed my renovation plan with the customer and provided a quote for carrying out the work which was accepted.

Renovating Bathroom Floor Grout

On the first day I set about raking out the cracked grout and stripping out the silicone between the tile and the bath. Silicone seems to attract mould and although it can be cleaned to some extent, I usually find its more effective to simply replace it. I then tidied up the bathroom to remove the waste grout and silicone, so the area was ready for grouting. I used a flexible White grout for this in order to match the original, although most of that was no longer White due to the staining.

I left the grout to set overnight and returned the next day to complete the job starting with the re-application of the silicone sealant, again in White but this time using an anti-mould variety. My attention then turned to the floor tile grouting which of course was now a mixture of fresh new grout and stained grout. I had realised this would be the result, so I had come prepared and was ready to apply Tile Doctor Grout Colourant in white to make everything uniform.

Before applying the colourant, I prepped the grout joint with Tile Doctor Pre-treat cleaner that is an acidic cleaning solution that is sprayed onto the grout and then scrubbed in. This cleans the grout joints, and the acidic nature of the cleaner helps prepare the grout to achieve a better bond with the colourant. The grout was then wiped with a wet sponge to remove the dirt and then dried ready for the colourant. Although the cleaner had helped to clean the grout and remove surface dirt it can’t do anything about deep seated staining, so colouring was still necessary.

Once the grout was dry the White grout colourant was painted onto the grout using a small brush wiping off any excess from the tile as I went. The Tile Doctor range of Grout Colourants come in eleven different colours and form an epoxy barrier over the grout preventing dirt from reaching the grout line and making it much easier to keep clean.

Bathroom Floor Grout After Restoration in Tooting SW17

Once the colourant had dried, I gave the floor a quick clean with Tile Doctor Neutral Tile Cleaner to get the ceramic tiles clean and the job was complete. The refreshed grout now has a consistent white appearance, and it really lifted the appearance of the bathroom.


Professional Restoration of a Bathroom Floor Grout in South London

Bathroom Floor Tile Grout Restoration in Tooting SW17 Read More »

=================================

South West London Tile Doctor

================================= Read More »

Scroll to Top